

Installing a Mini Red Dot Sight can significantly enhance your shooting experience, offering quick target acquisition and improved accuracy. As a trusted Mini Red Dot Sight supplier, I'm here to guide you through the installation process step by step. Whether you're a seasoned shooter or a beginner, this guide will help you get your Mini Red Dot Sight up and running in no time.
Step 1: Gather Your Tools
Before you begin the installation, make sure you have all the necessary tools on hand. You'll typically need a screwdriver (usually a Phillips or Allen wrench, depending on the sight and firearm), a torque wrench (if available), and a cleaning cloth to wipe down the mounting surfaces. Having these tools ready will ensure a smooth installation process.
Step 2: Choose the Right Mounting Location
The first crucial decision is where to mount your Mini Red Dot Sight on your firearm. The ideal location depends on the type of firearm you're using and your personal shooting preferences. For most rifles and shotguns, the top of the receiver or the picatinny rail is a common choice. This provides a stable platform and allows for easy access to the sight.

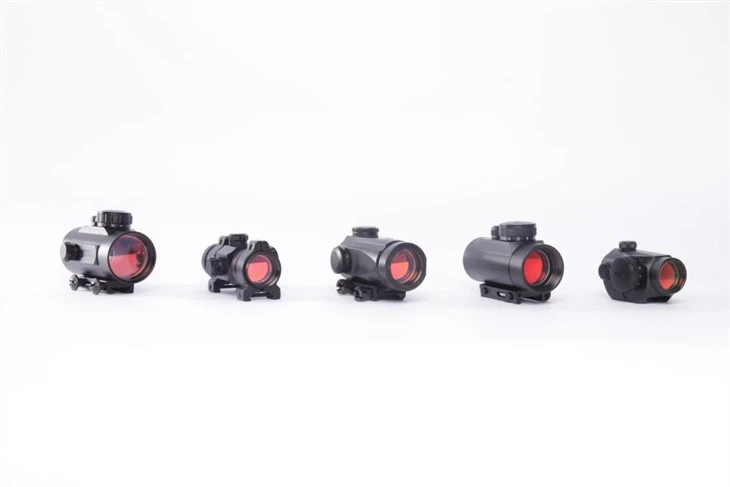
When choosing the mounting location, consider factors such as eye relief, which is the distance between your eye and the sight. You want to ensure that you have a comfortable and clear view of the target through the sight. Additionally, make sure the sight is positioned in a way that doesn't interfere with other accessories or components on your firearm.
Step 3: Prepare the Mounting Surface
Once you've chosen the mounting location, it's important to prepare the surface to ensure a secure and stable installation. Use a cleaning cloth to wipe down the mounting surface on your firearm and the bottom of the Mini Red Dot Sight. This will remove any dirt, debris, or oil that could affect the adhesion of the sight.
If your sight comes with a mounting plate or base, make sure it is clean and free of any defects. Inspect the mounting holes on the plate and the firearm to ensure they align properly. If necessary, use a file or sandpaper to smooth any rough edges or burrs on the mounting surface.
Step 4: Attach the Mounting Plate or Base
Most Mini Red Dot Sights come with a mounting plate or base that needs to be attached to the firearm first. Align the mounting holes on the plate with the holes on the firearm and insert the screws. Use a screwdriver to tighten the screws, but be careful not to overtighten them, as this could damage the sight or the firearm.
If you have a torque wrench, it's recommended to use it to ensure that the screws are tightened to the correct specifications. Refer to the manufacturer's instructions for the recommended torque settings. Once the mounting plate is securely attached to the firearm, double-check to make sure it is level and stable.
Step 5: Mount the Mini Red Dot Sight
With the mounting plate or base attached to the firearm, it's time to mount the Mini Red Dot Sight. Align the sight with the mounting plate and insert the screws through the holes in the sight and into the mounting plate. Use a screwdriver to tighten the screws, again being careful not to overtighten them.
Once the sight is securely attached to the mounting plate, check to make sure it is level and centered. You can use a level or a straight edge to ensure that the sight is aligned properly. If necessary, adjust the position of the sight until it is level and centered.
Step 6: Zero the Mini Red Dot Sight
After mounting the Mini Red Dot Sight, the next step is to zero it. Zeroing the sight means adjusting it so that the point of aim (where you're looking through the sight) matches the point of impact (where the bullet hits the target). This ensures that you can accurately hit your target.
To zero the sight, you'll need to go to a shooting range and set up a target at a specific distance. Start by shooting a few rounds at the target using the sight. Observe where the bullets are hitting the target and make adjustments to the windage (horizontal adjustment) and elevation (vertical adjustment) knobs on the sight.
Most Mini Red Dot Sights have windage and elevation adjustment knobs that allow you to make small adjustments to the position of the red dot. Turn the knobs in the direction indicated by the markings on the sight to move the red dot up, down, left, or right. Make small adjustments and shoot a few more rounds after each adjustment until the point of aim matches the point of impact.
Step 7: Test the Mini Red Dot Sight
Once you've zeroed the Mini Red Dot Sight, it's important to test it to make sure it is working properly. Shoot a few more rounds at the target and observe the performance of the sight. Make sure the red dot is clear and easy to see, and that it stays in place during recoil.
If you notice any issues with the sight, such as the red dot disappearing or moving out of place, double-check the installation to make sure everything is secure. If necessary, make further adjustments to the sight or consult the manufacturer's instructions for troubleshooting.
Step 8: Maintain Your Mini Red Dot Sight
To ensure the long-term performance of your Mini Red Dot Sight, it's important to maintain it properly. Keep the sight clean by wiping it down regularly with a cleaning cloth. Avoid using harsh chemicals or abrasive materials, as these could damage the sight.
Store the sight in a cool, dry place when not in use. If you're using the sight in harsh conditions, such as in the rain or in dusty environments, consider using a protective cover to keep it clean and dry.
In conclusion, installing a Mini Red Dot Sight is a relatively straightforward process that can greatly enhance your shooting experience. By following these steps and using the right tools, you can ensure a secure and accurate installation. If you have any questions or need further assistance, don't hesitate to contact us. As a leading supplier of Mini Red Dot Optics Sight and Mini Shotgun Red Dot Sight Scope, we're here to help you find the perfect sight for your needs and provide you with the support you need to get the most out of it.
If you're interested in purchasing a Mini Red Dot Sight or have any questions about our products, please feel free to contact us. We'd be happy to discuss your requirements and help you find the right solution for your shooting needs.
References
- Firearm Owner's Manual
- Mini Red Dot Sight Manufacturer's Instructions


